Construction journal: learning new skills with a skill saw
We have been busy here in Big Woods country. Our riding lawn mower started eating belts, which means the push mower has become Michael’s new best friend. In the meantime, I’ve been learning how to use a variety of saws. Michael has always been in charge of making big ones into little ones, but he has these 3-4 acres of grass calling his name...which left me on my own. So, this is what I’ve learned:
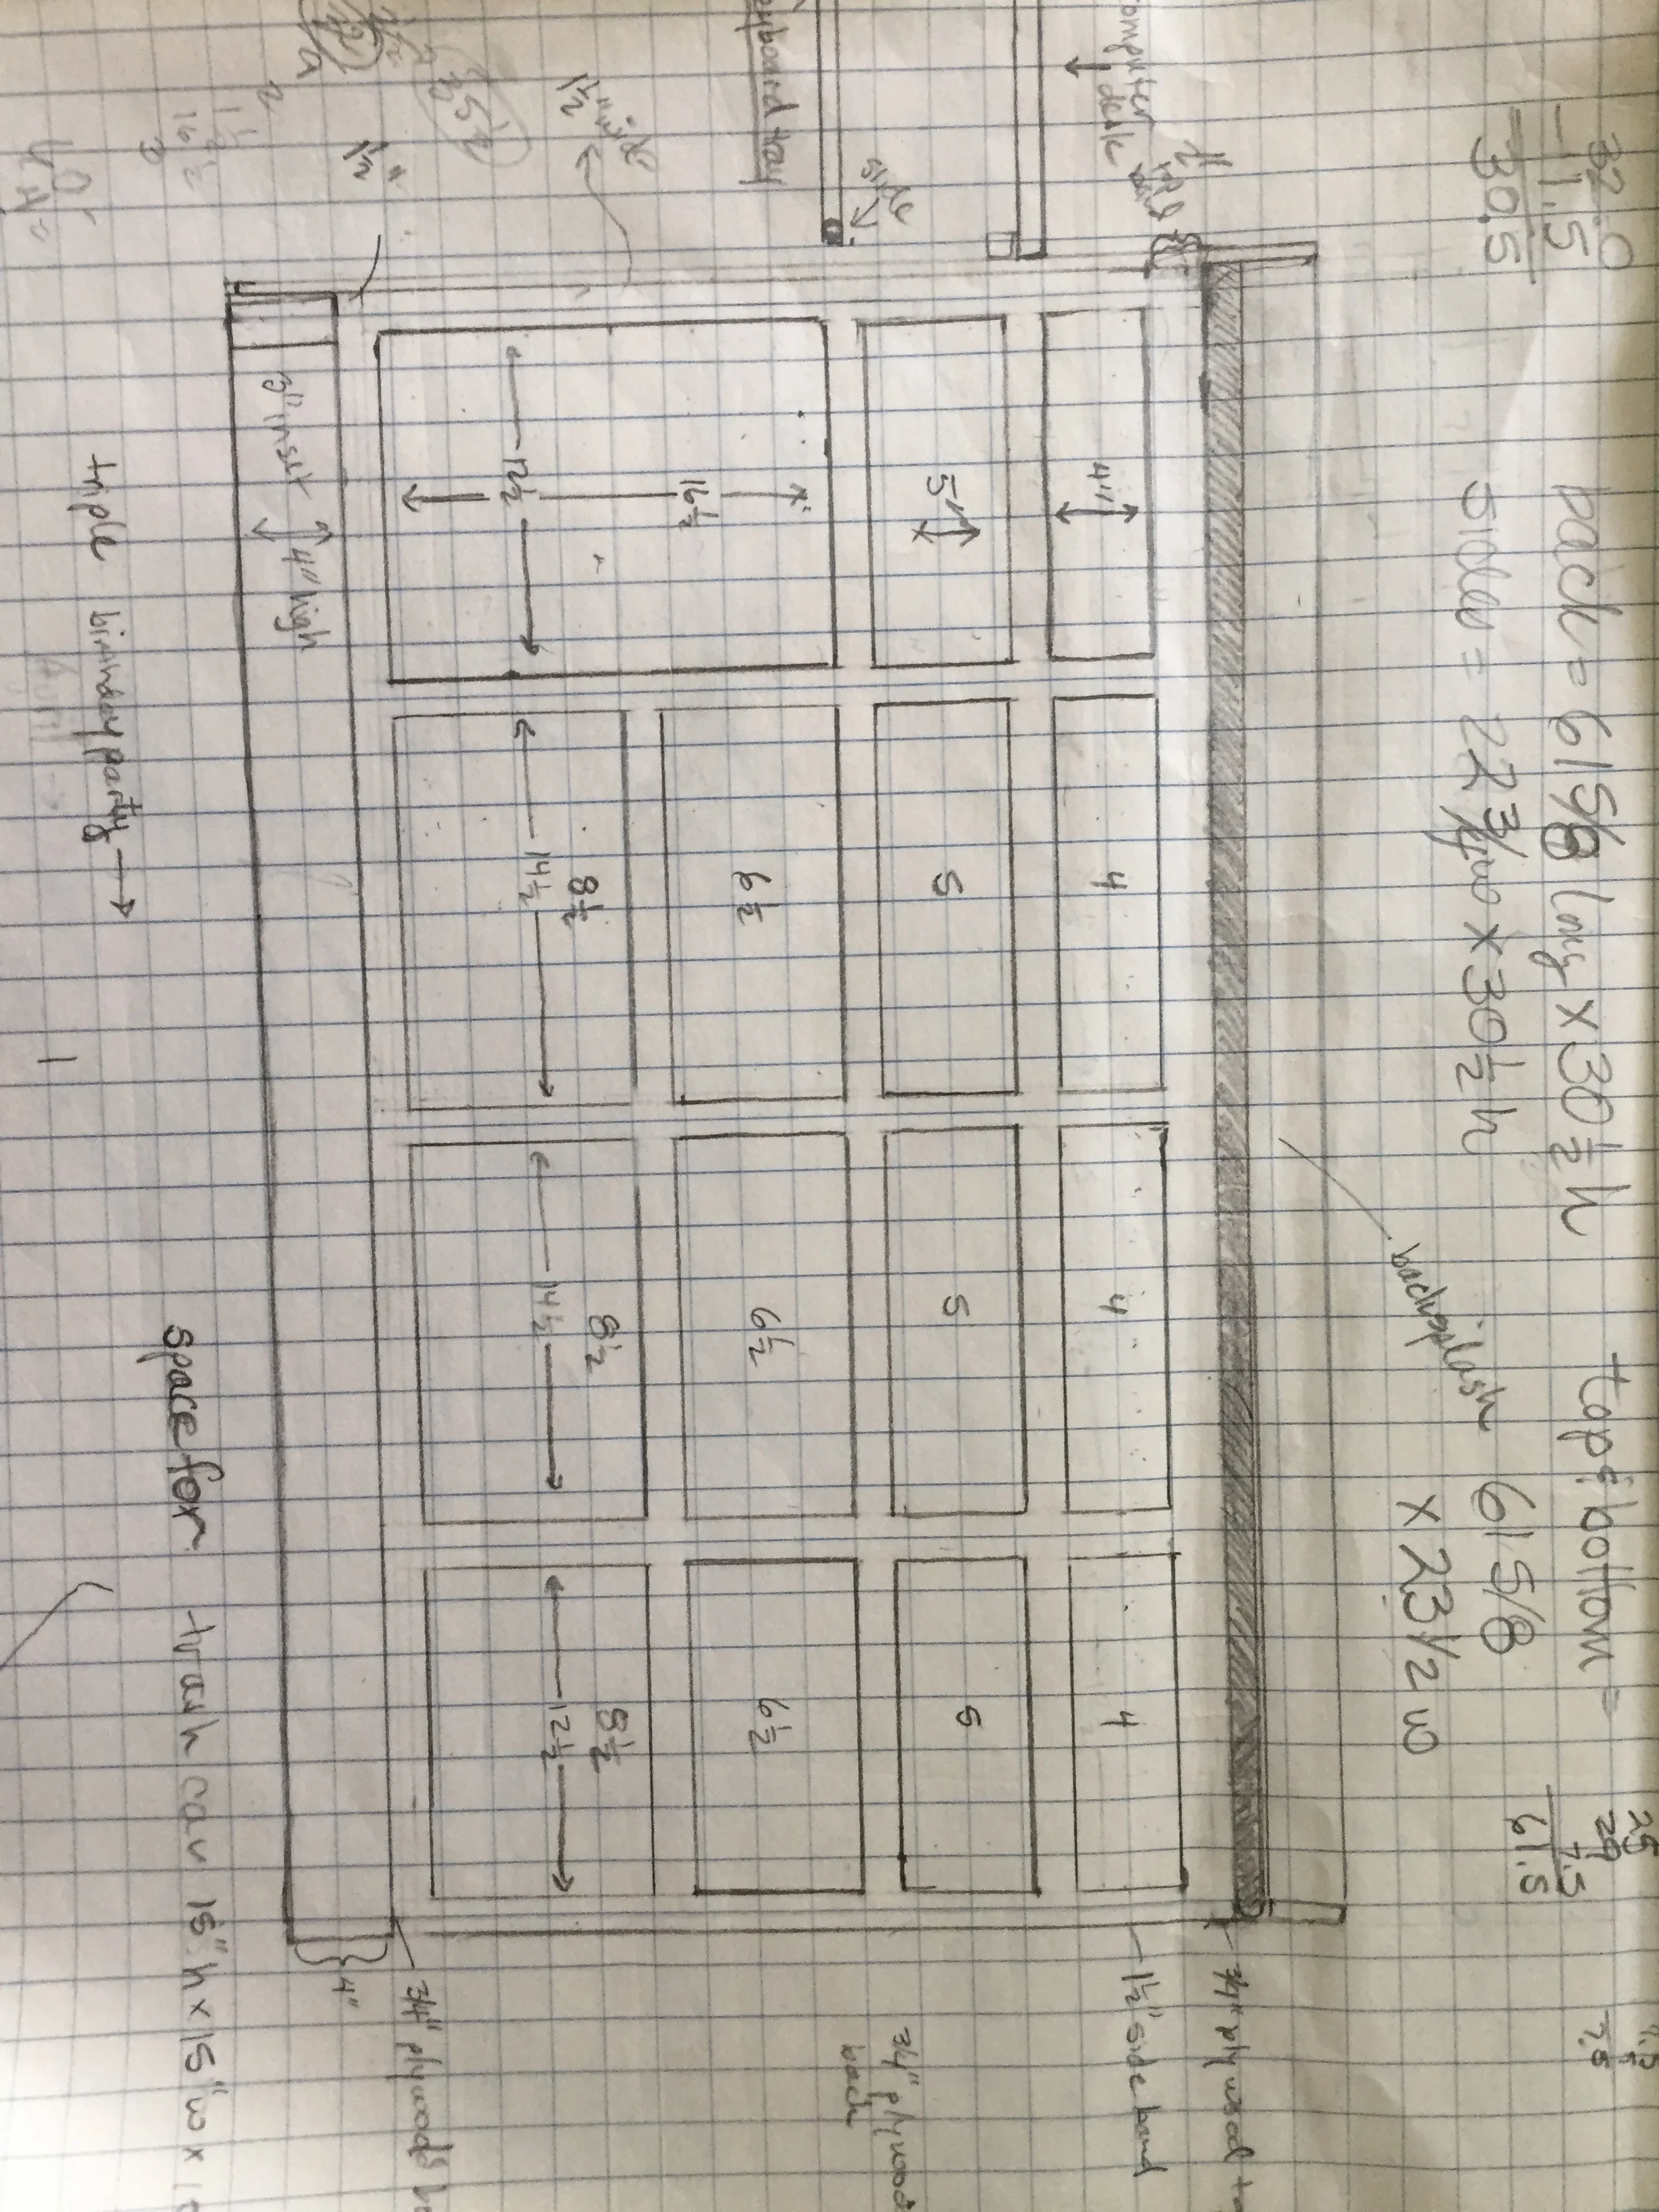
First, I designed a counter with drawers for Irene’s new space using information from books my Uncle Tom sent to me.
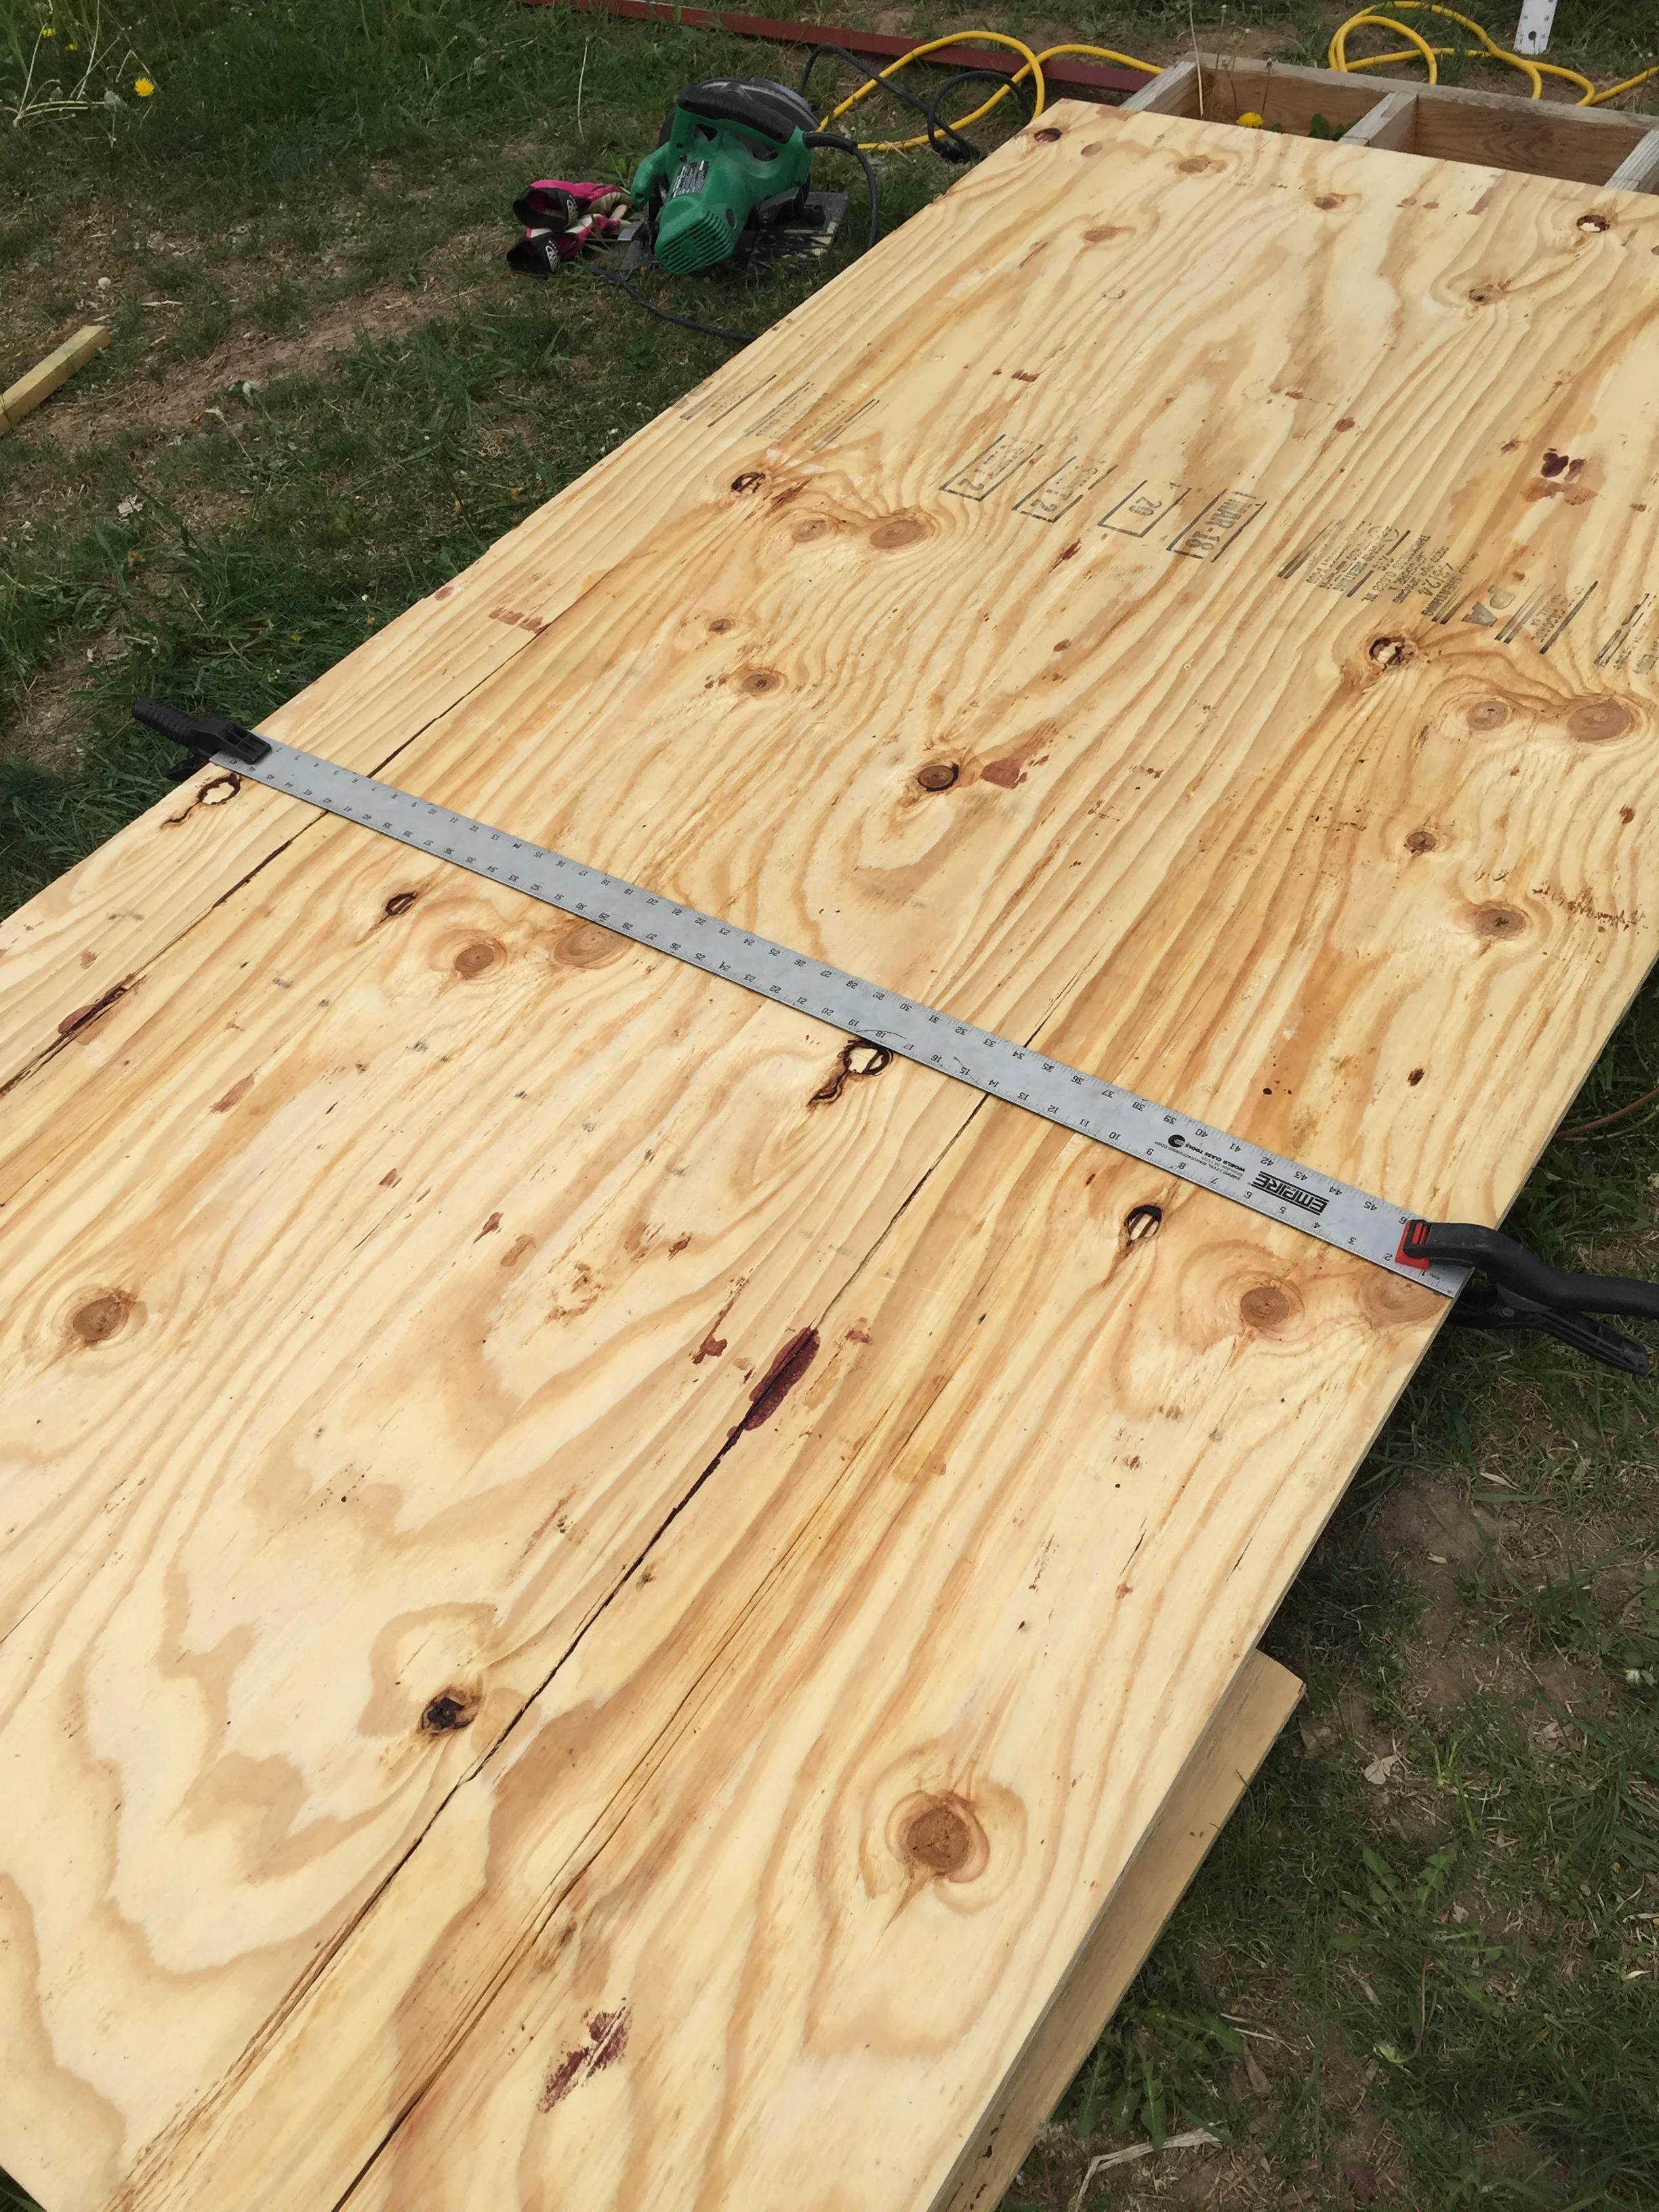
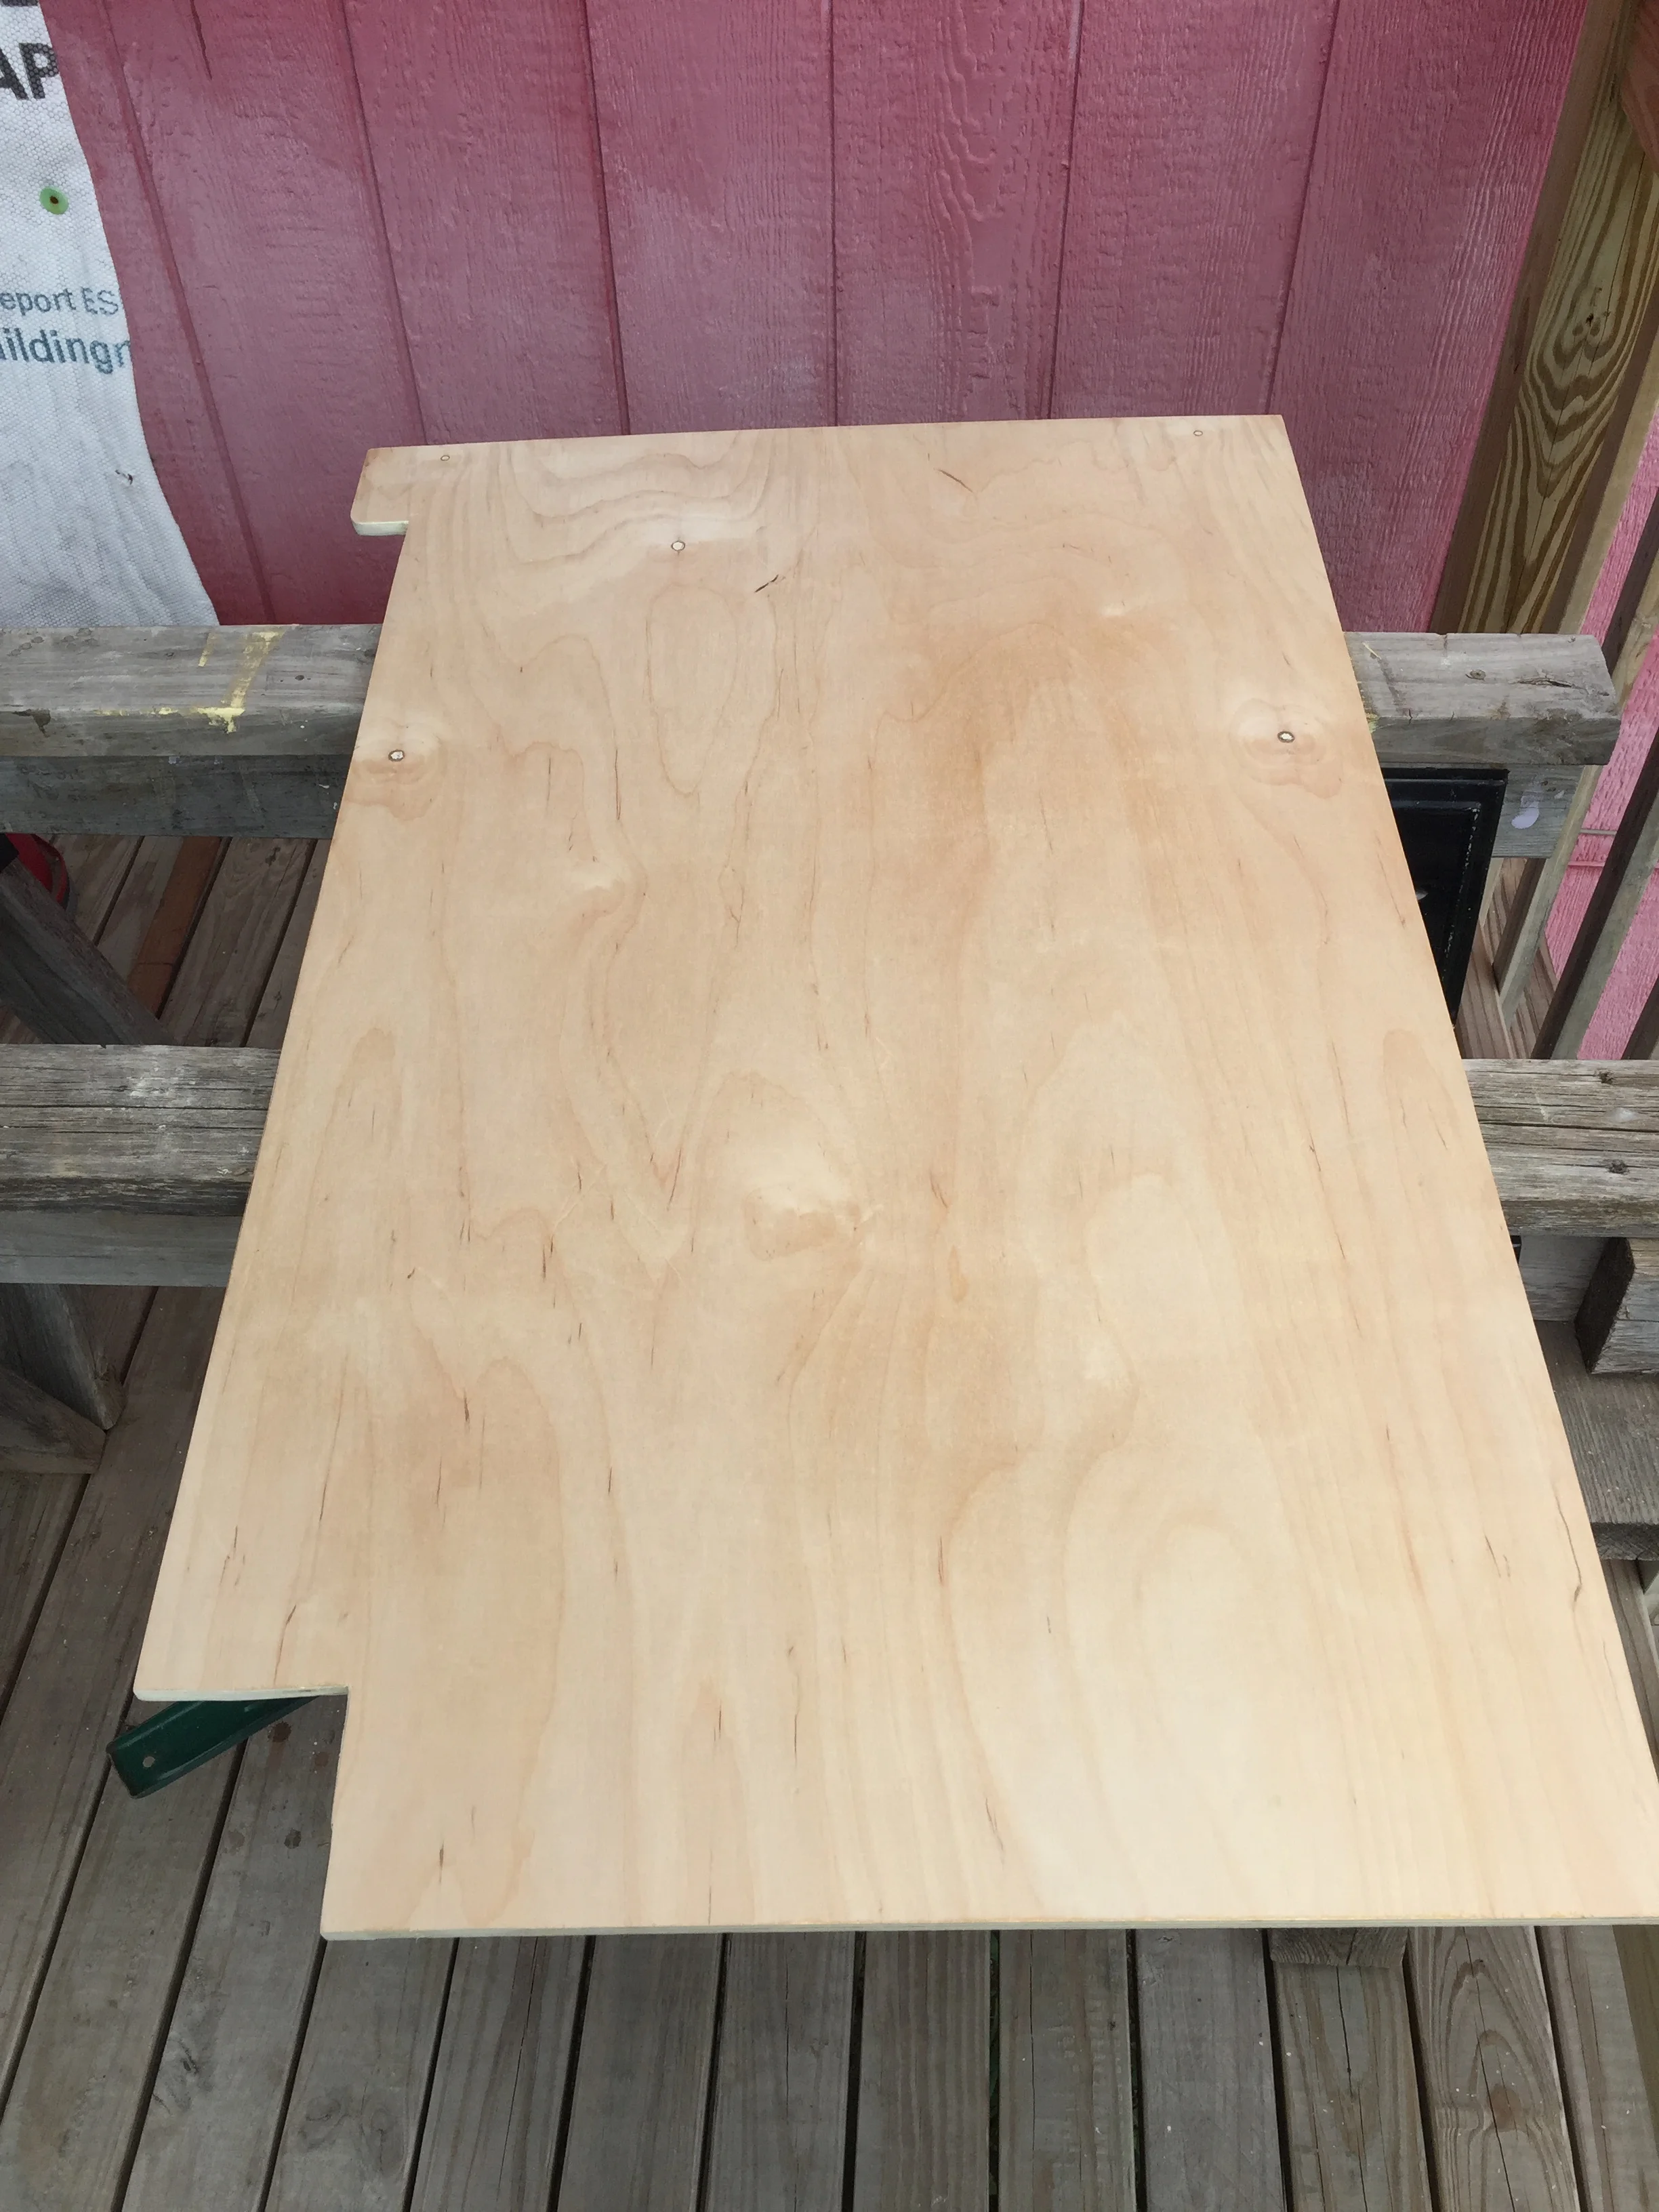
I found a quartz countertop that fit the space we made last summer. It was beautiful and half price, so I bought it. It has been gathering dust ever since. It’s size controlled other dimensions. We bought 3/4” plywood, as my Uncle Tom books said that is what it takes to support heavy countertops. Michael helped me lay the plywood on top of the frame he made last fall to cut our metal siding.

I used scrap lumber to support the board beyond the frame so I didn’t have to cut through the frame itself. Michael just cut through the frame with the metal, but I didn’t want to deal with the different resistances.
In order to keep my lines straight, I clamped my straight edge to the plywood.
No wiggles!
I then clamped my straight edge 5 1/8” down from my line, so I had a guide to help me keep my actual cut straight.
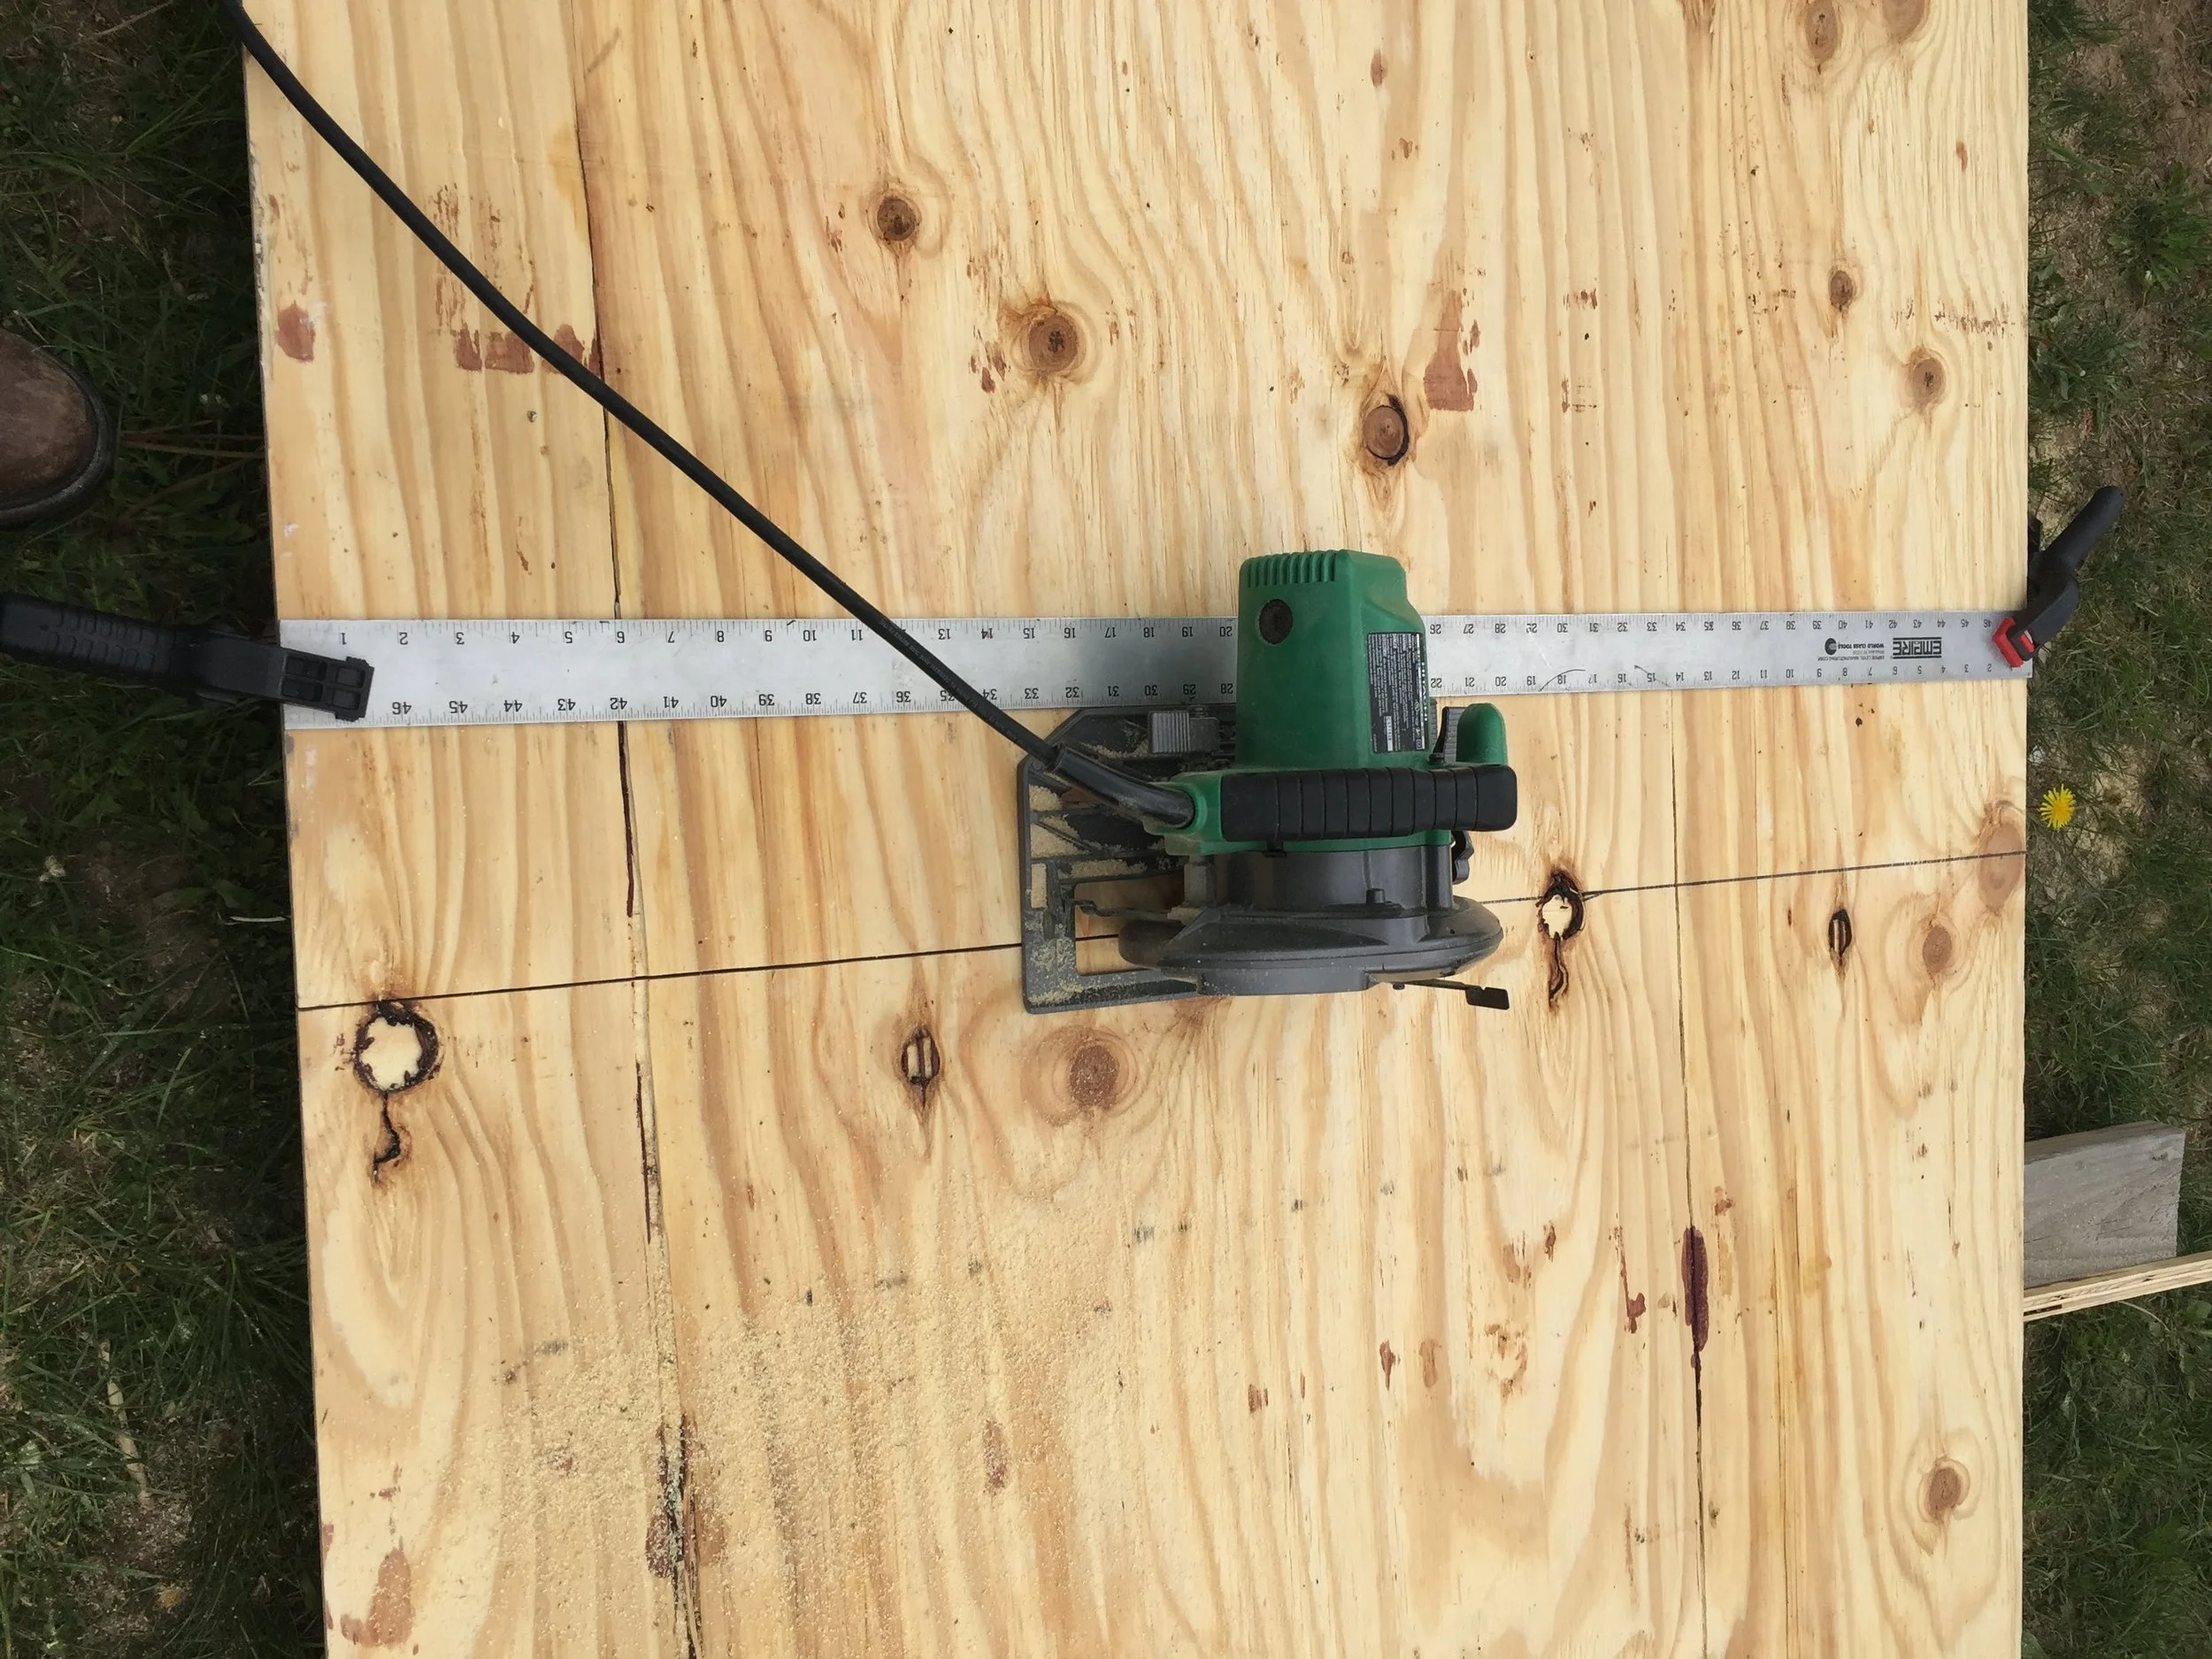
This may seem like a lot of bother, but I really needed my boards to be uniform. The guys on You Tube had great table saw supports in fabulous workshops. I have a lawn.
Once I got all of my boards cut, they needed to be put together. A real carpenter would use specially cut joints that interlock. I just wanted this to go together and not fall apart. The You Tube guys recommended pocket screws as being the fast and dirty way to go. I decided to give it a whirl.
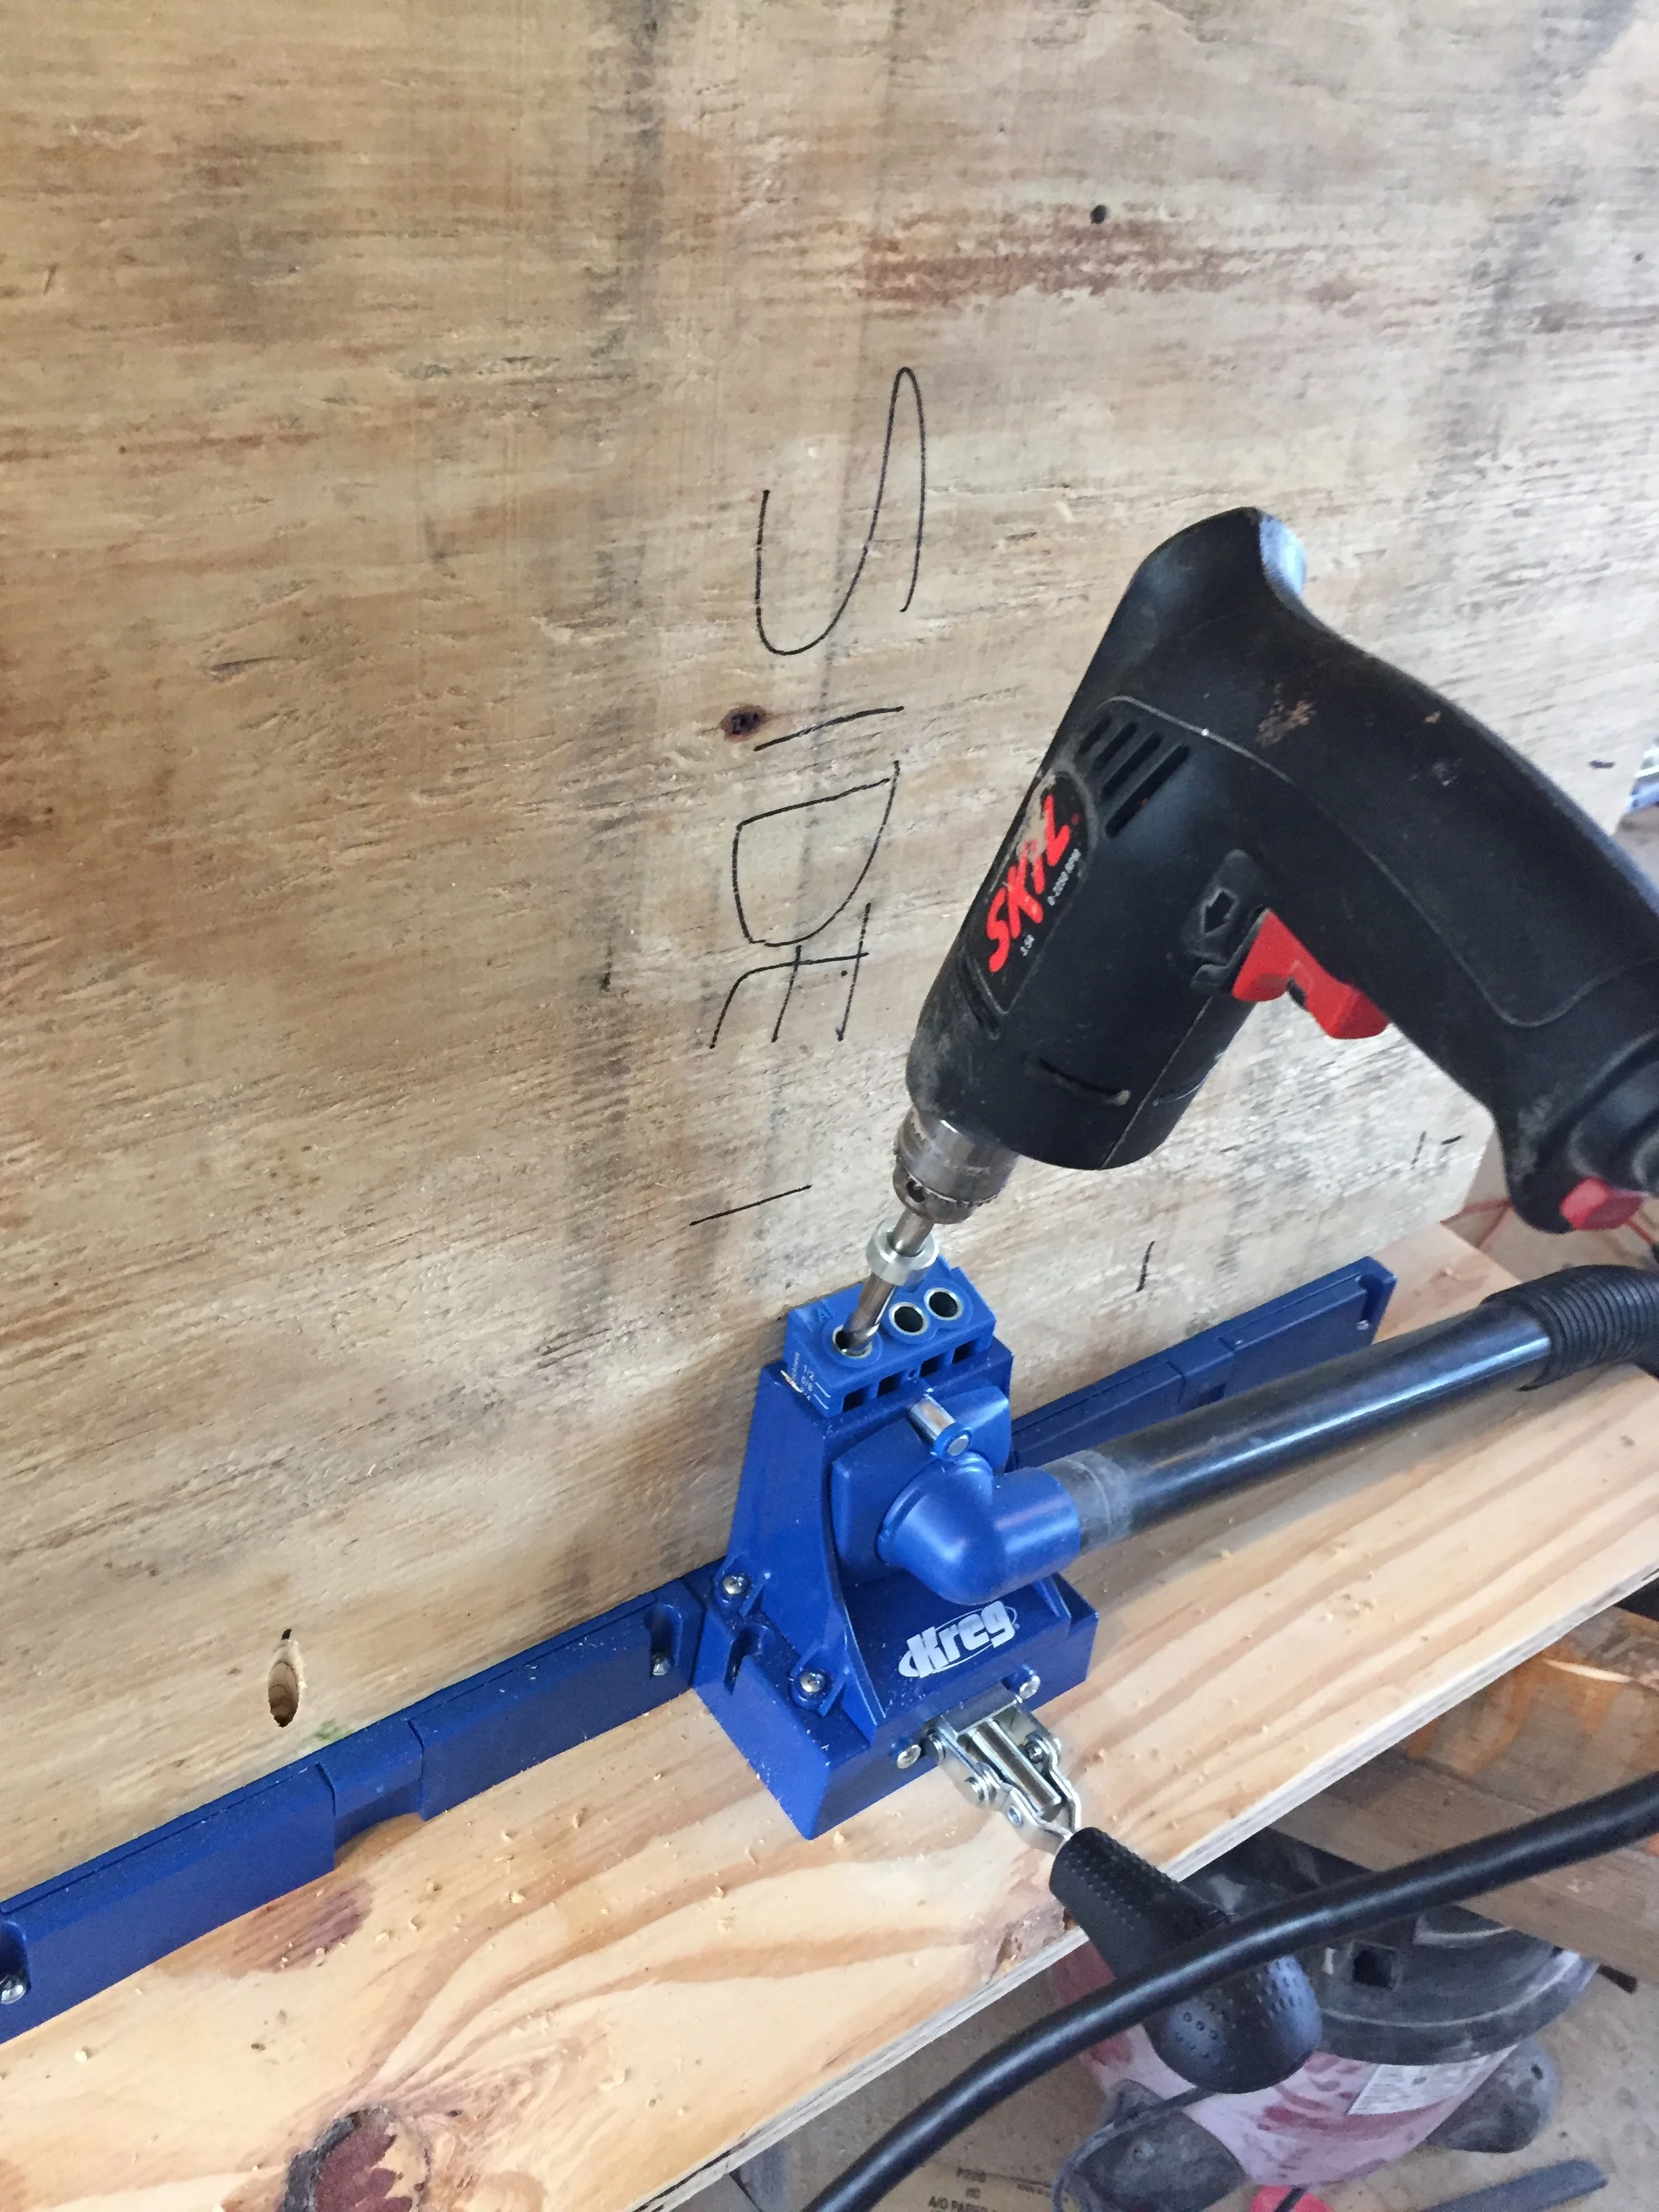
EBay. We love EBay. I put the pocket jig together. Michael helped me hold the big pieces. He needed a break from mowing anyway.
The next step was to screw the pieces together.
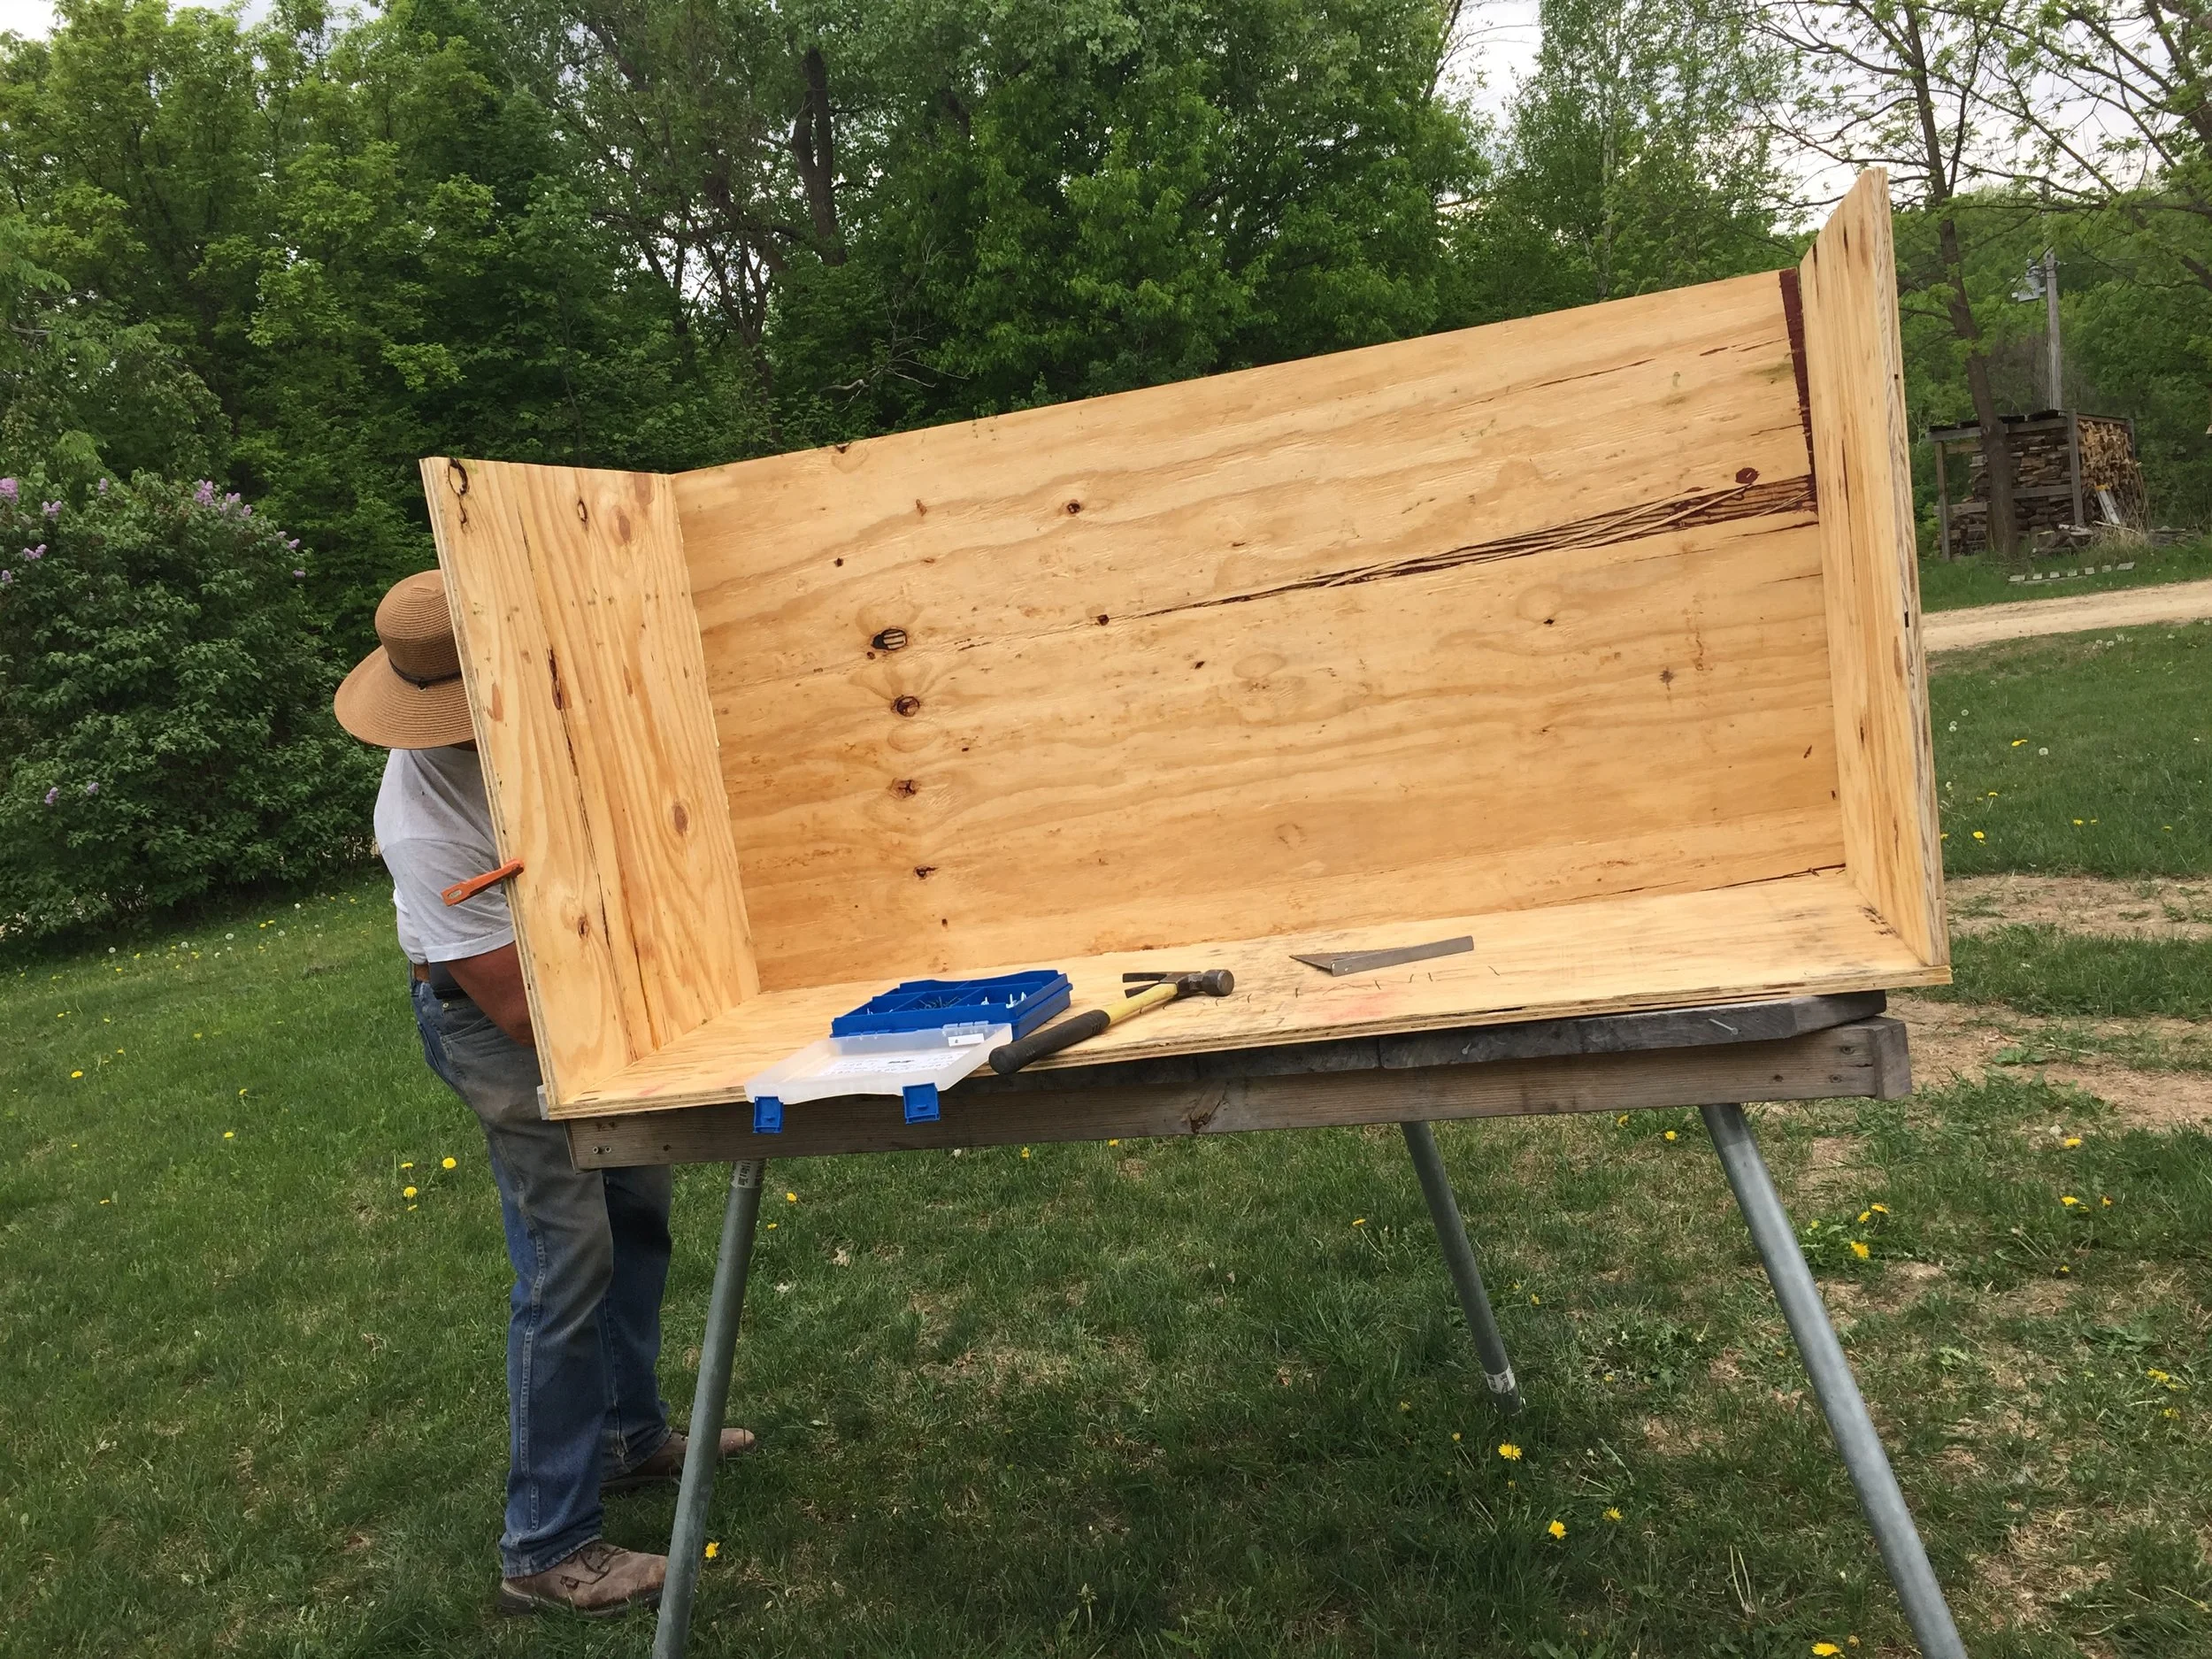
Plywood is never straight. We had to muscle it into square as we screwed the sections together. Clamps are only so helpful at this stage (although we did use them when screws didn’t want to sink properly). We also glued.
Once all the pieces were together, we set the box on top of the 4” high supports we installed prior to laying the flooring.
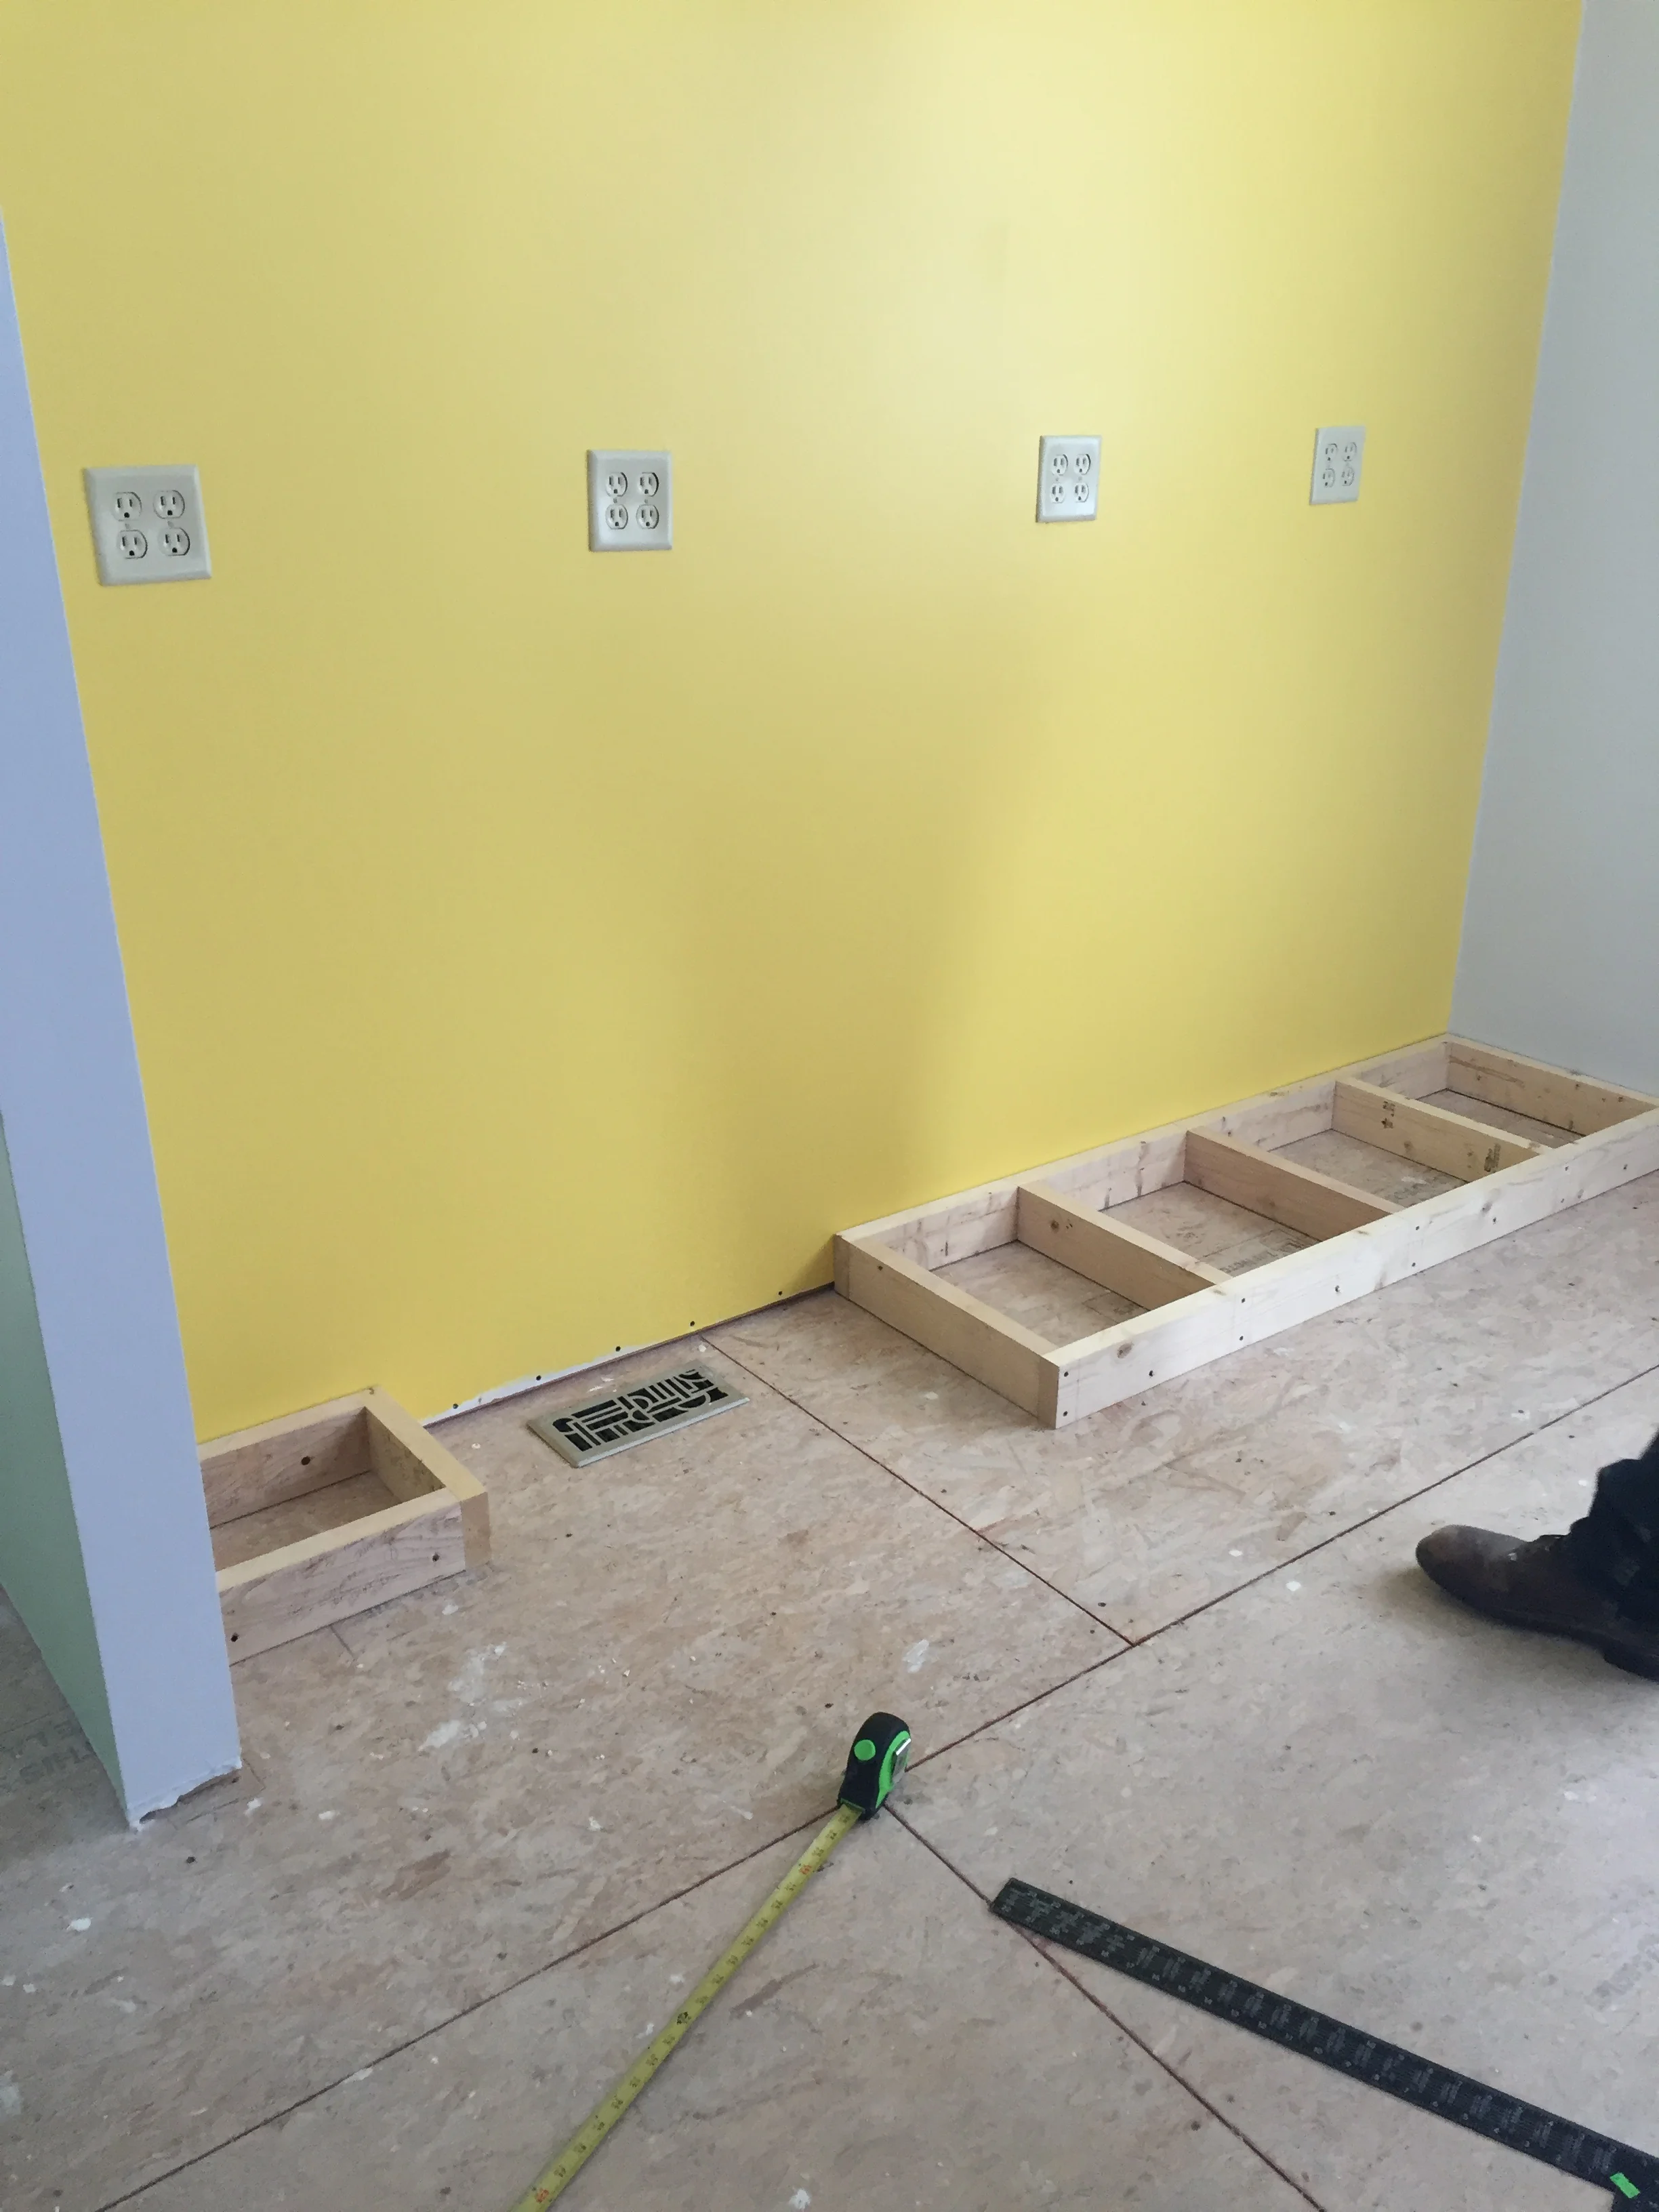
I had to plan the cabinetry ages before I could start the construction of the carcase.
The base is narrower than the carcase to allow room for the toe kick.
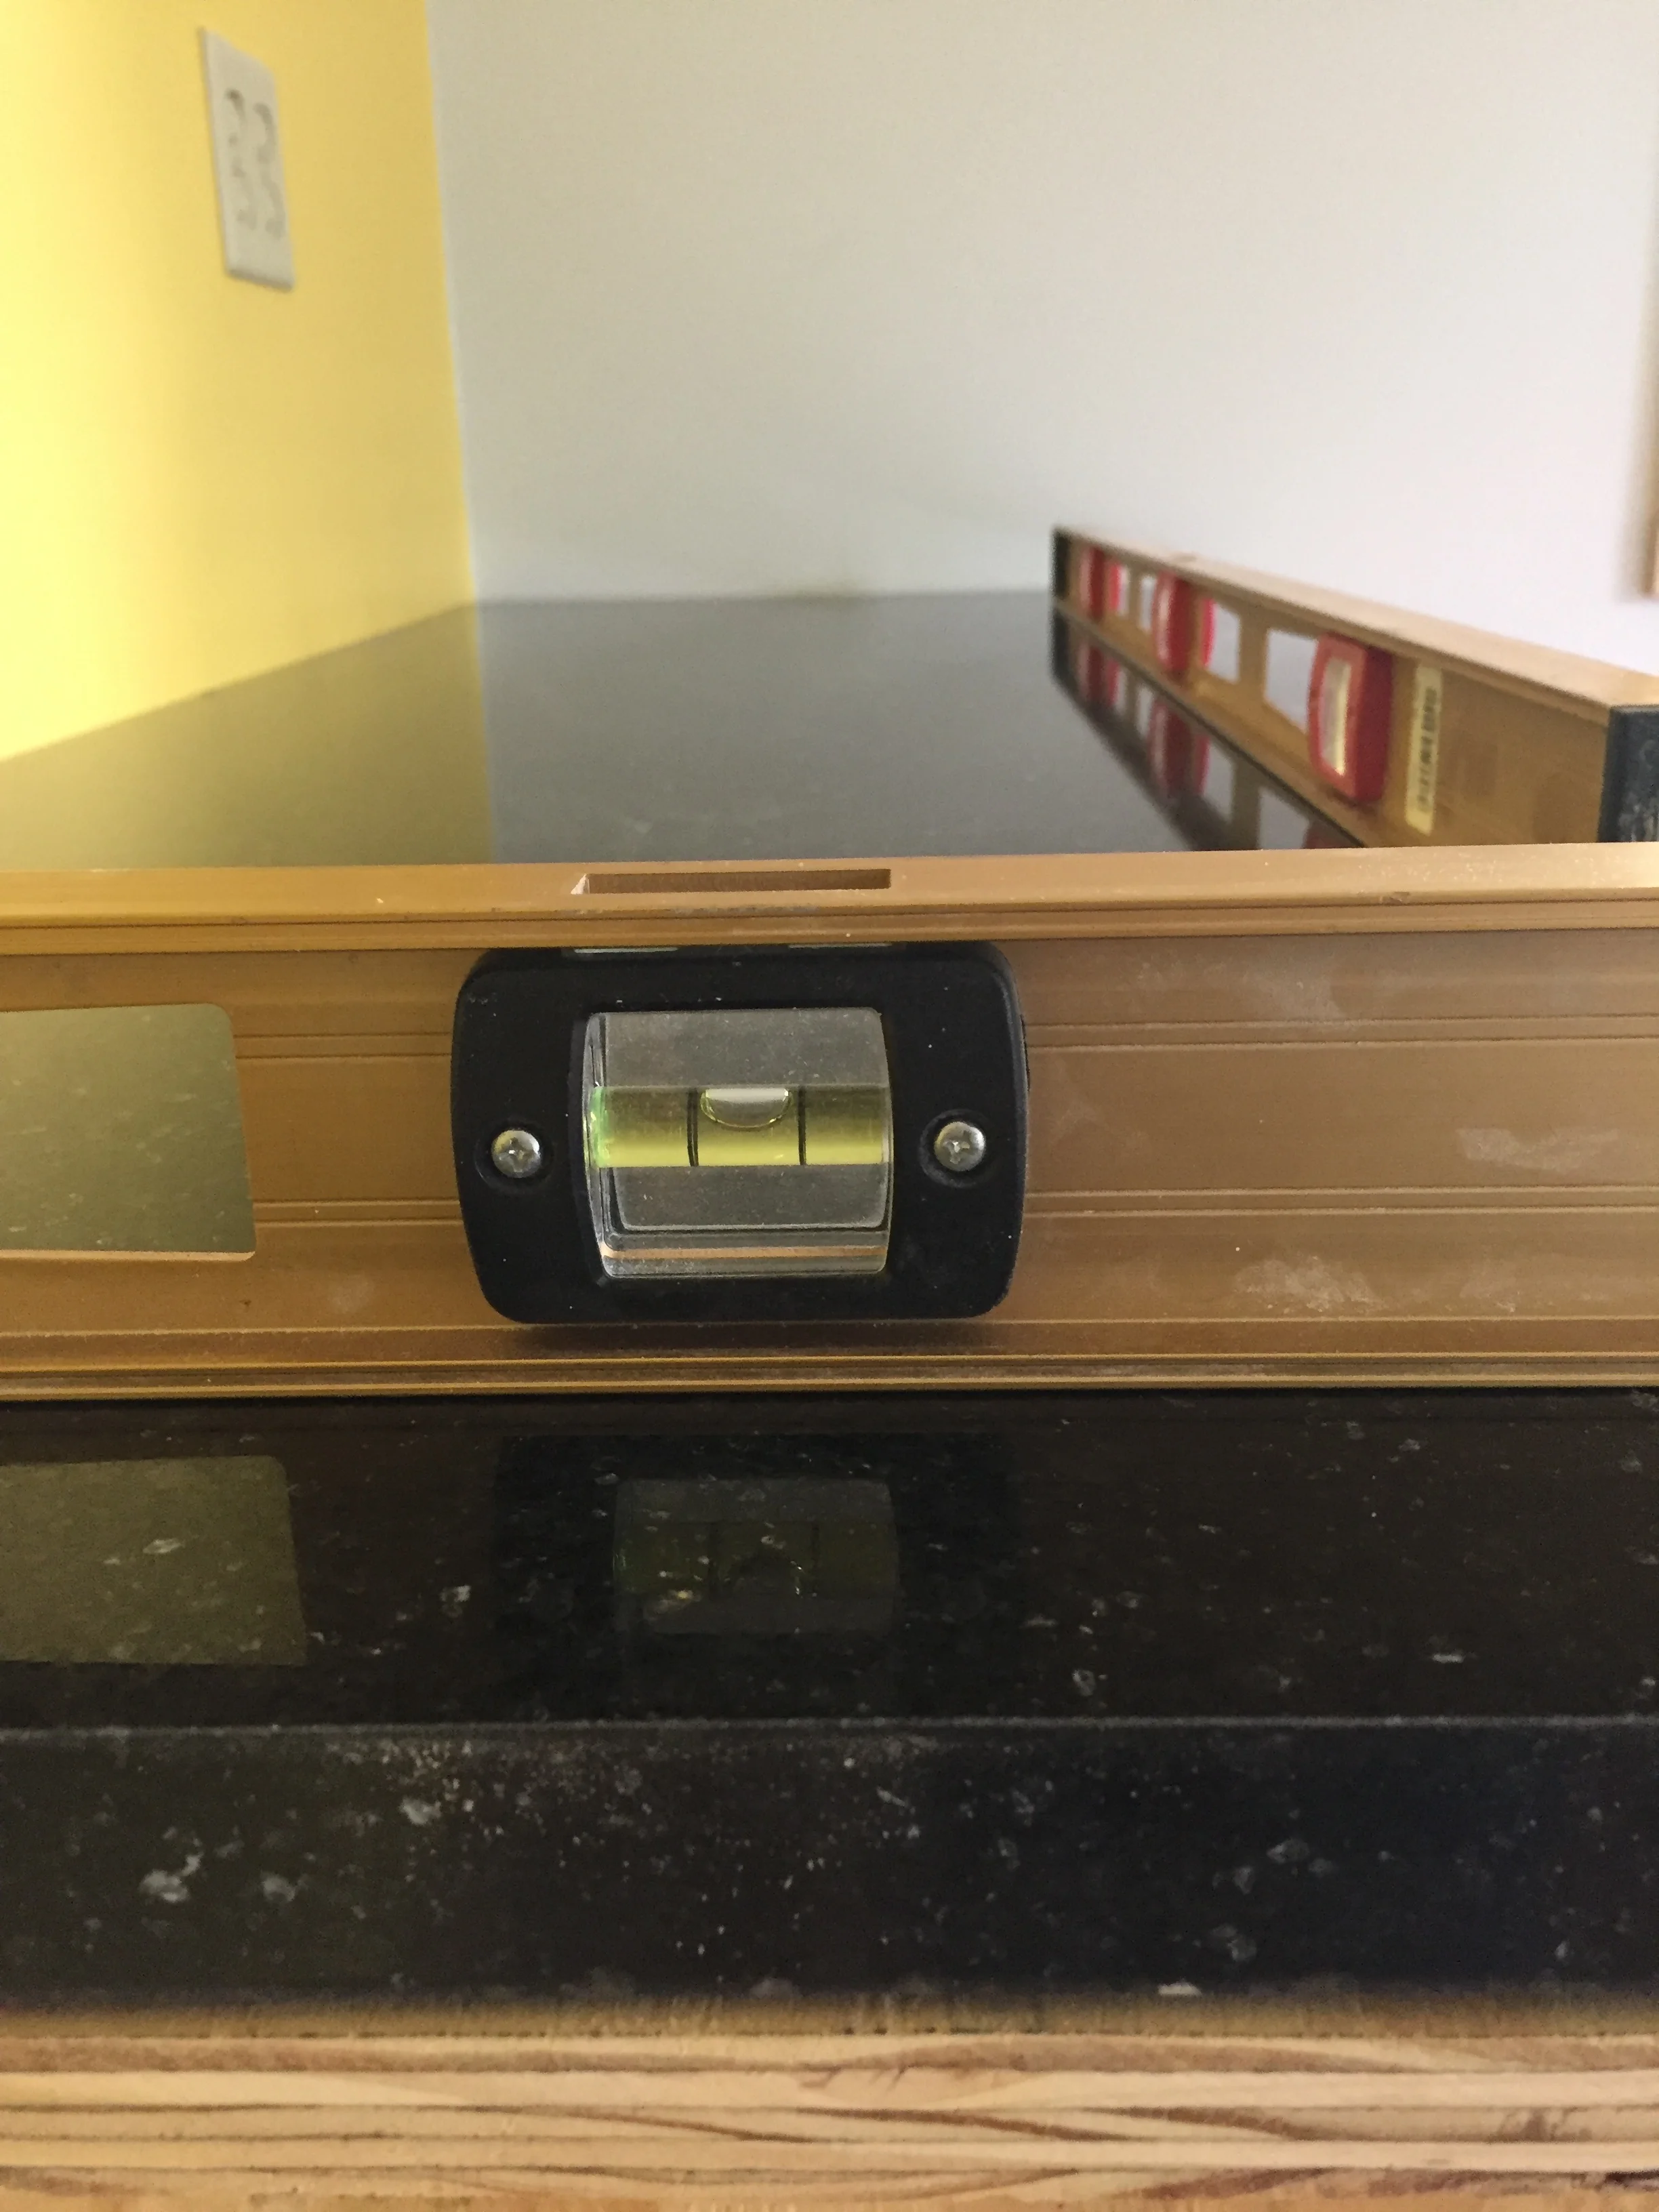
We dry fitted the countertop and I leveled it by shimming the carcase.
We used construction glue left over from putting down the underlayment for the flooring to attach the quartz to the carcase.
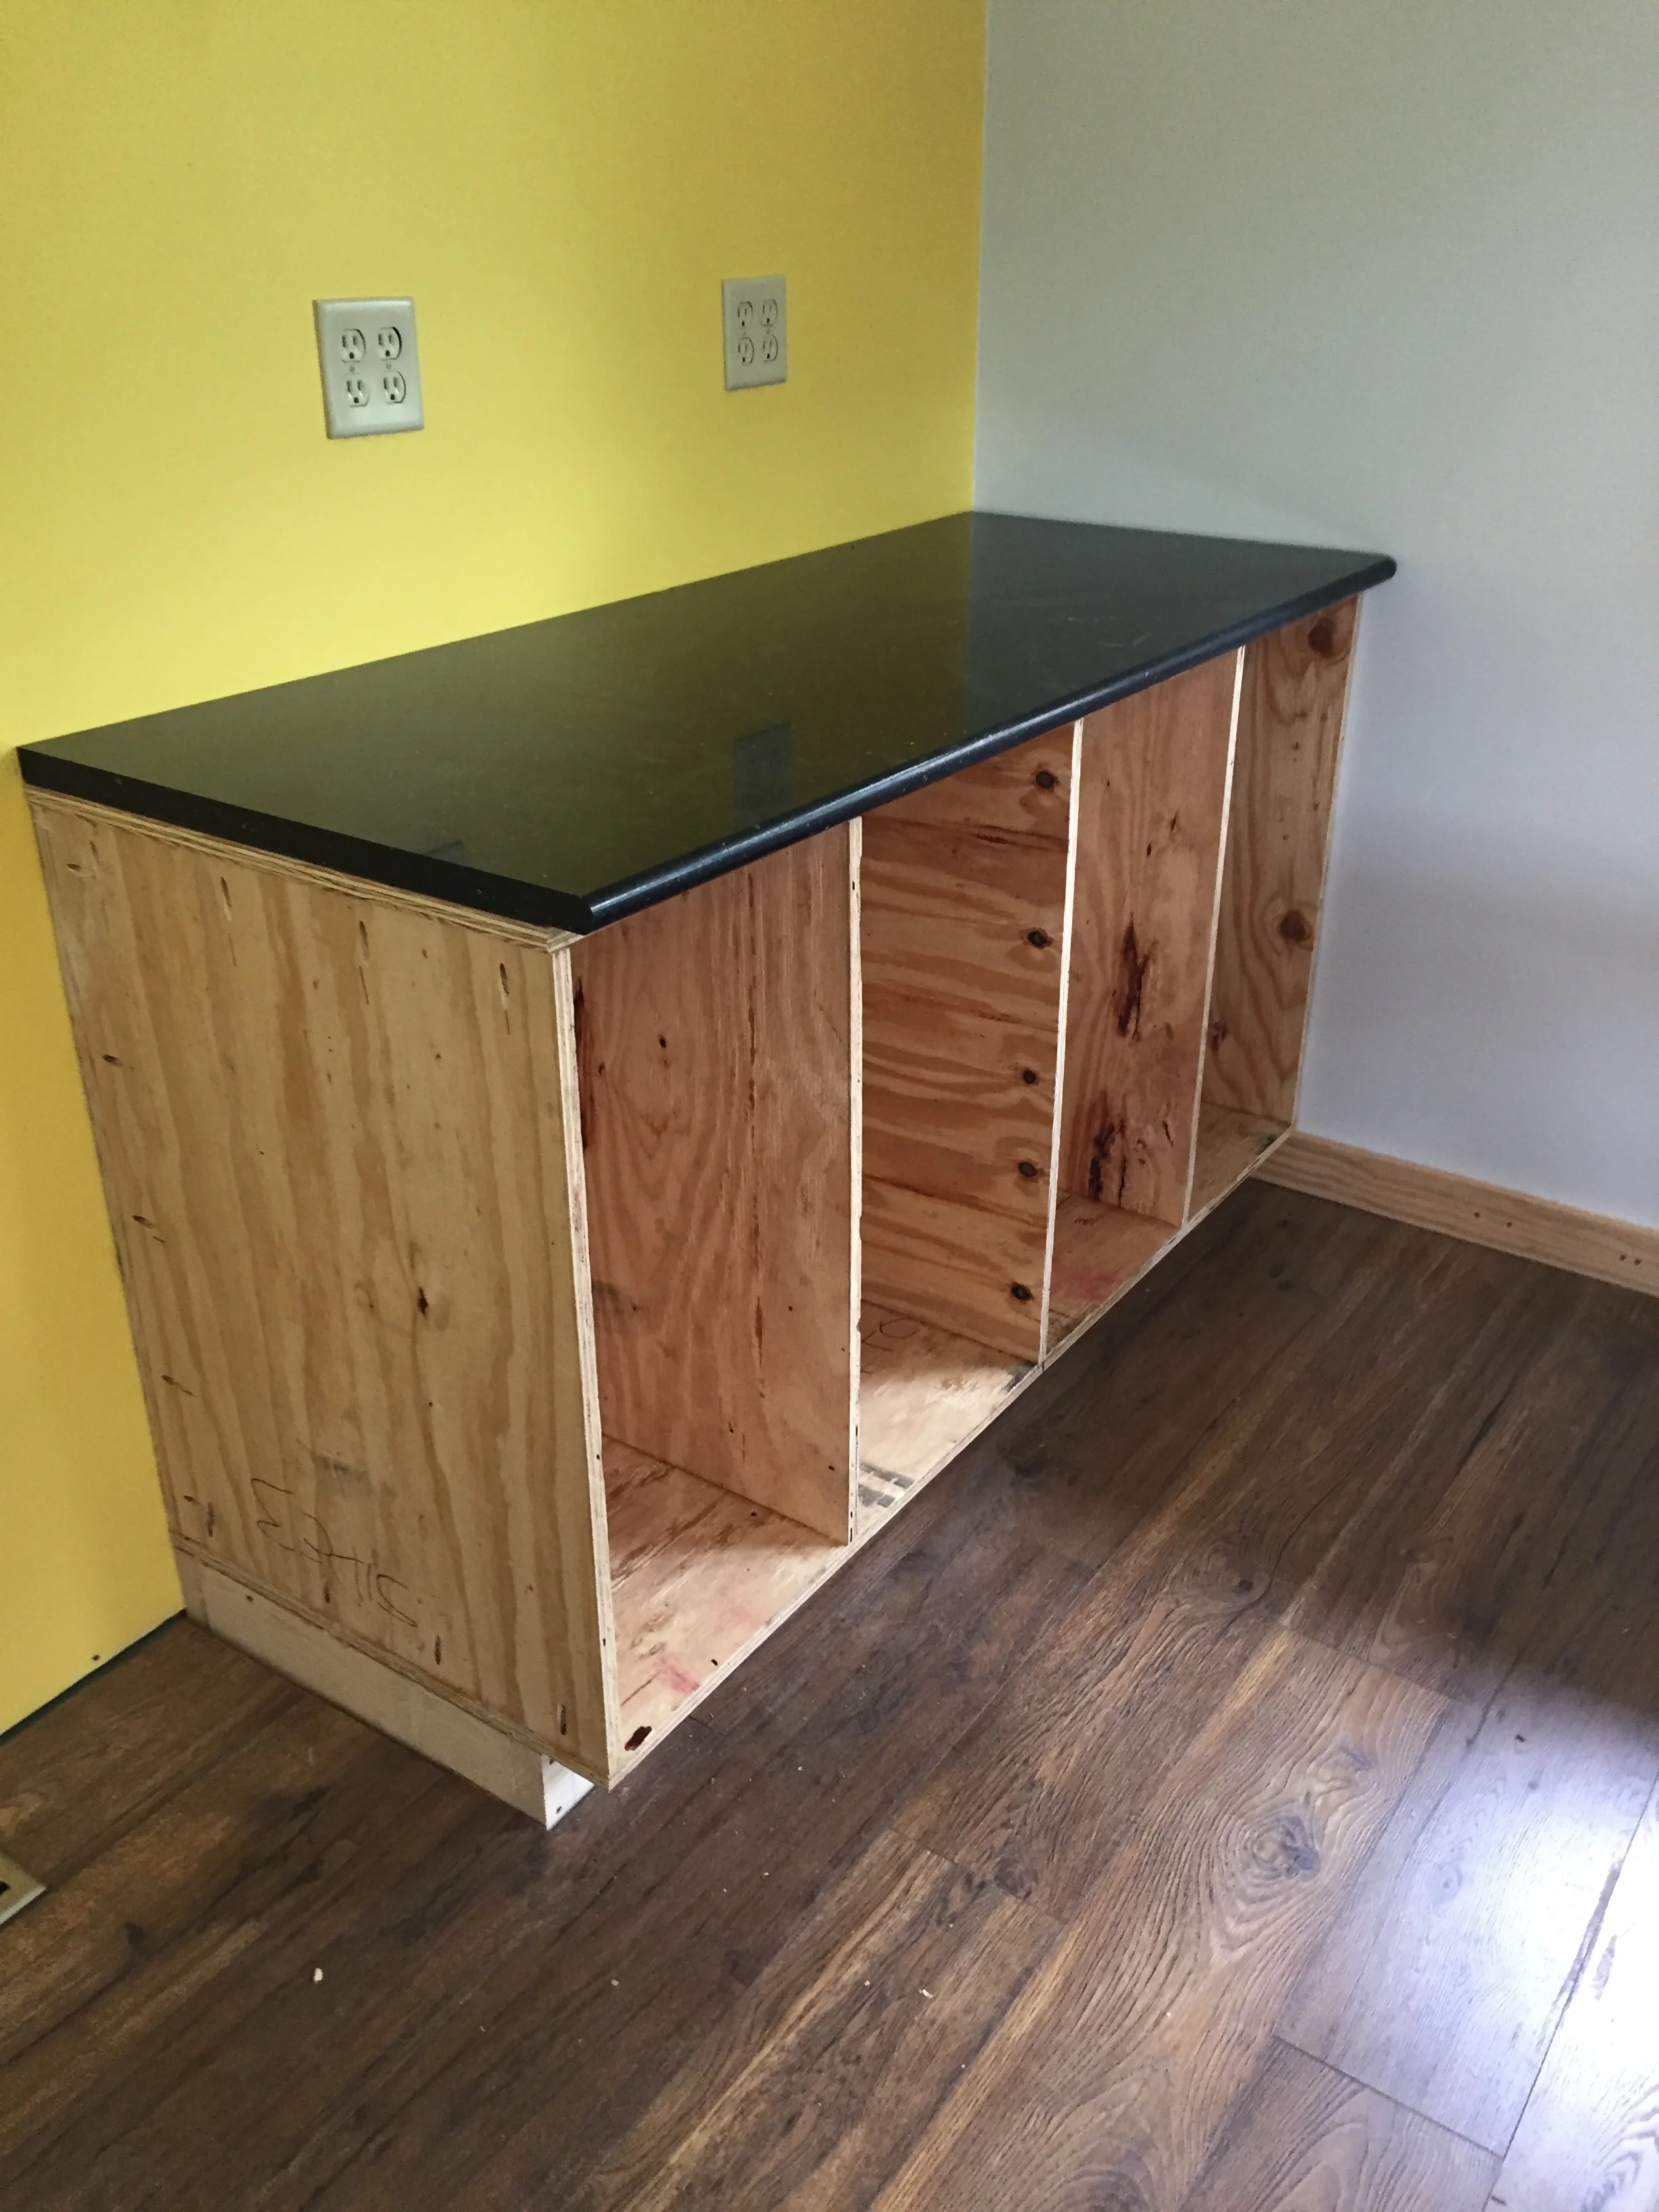
Everything is flush!!!
I cut a 1/2” birch plywood panel that will extend above the countertop so things won’t fall off the counter onto the computer desk I will attach to the carcase.
Note that nice little curve at the top that protects the edge of the quartz!
My next challenge will be making drawers. I am experimenting with boxes for the bathroom made from the scraps from the half-sheet used to make the finished side of the carcase. But that is fodder for another day...
No grand baby photo in this post. She will be here at the end of this week, so I won’t have to depend on my very busy daughter for photos!